
Last Updated: November 8, 2026
Quick Summary
Bulk custom apparel for corporate events works best when you choose the garment and decoration method before artwork is approved, collect sizes in advance, and compare quotes on full landed cost rather than unit price. Screen printing suits event tees and large graphics, while embroidery is the default for polos, hoodies, workwear and caps. Confirm your dispatch date in writing at the quote stage so a courier delay cannot derail your event.
- Start with the garment, not the logo: fabric and cut decide whether a shirt survives a full event day.
- Screen printing setup cost is fixed per colour, so per-item price falls sharply as quantity rises.
- Embroidery needs a one-off digitised file, so it rewards logos reused across multiple orders.
- Order a modest buffer above headcount and apply a size curve weighted toward medium and large.
- The biggest delay is almost always artwork approval, not production, so sign off proofs quickly.
Table of Contents
- Why bulk custom apparel earns its place at corporate events
- Bulk custom shirts for events: garment types and fabric choices
- Screen printing vs embroidery: choosing the right decoration method
- Custom branded apparel: logo placement and artwork preparation
- The corporate apparel order checklist: quantities, sizing and size curves
- Budgeting for bulk orders: per-item pricing, volume discounts and total cost
- Planning timeline and turnaround: from quote request to dispatch
- Request a bulk custom apparel quote from Promo Wear Studio
- Frequently Asked Questions
Why bulk custom apparel earns its place at corporate events
Bulk custom apparel for corporate events turns a room full of strangers into a team, and a scruffy stall into a brand people remember. Organisers who plan garment selection early generally get better wear, better fit and fewer last-minute headaches.
The case for branded apparel is practical rather than decorative. A logo on a polo does three jobs at once: it identifies staff instantly, it makes volunteers approachable, and it keeps the brand visible long after the event pack is binned. Repeated exposure to a logo is generally understood to build recognition, and apparel is an inexpensive way to put a logo in front of people through the day.
Below, this guide covers garment types, decoration methods, sizing, budgeting and a realistic planning timeline. It also flags the mistakes that turn a straightforward bulk order into a scramble.
Bulk custom shirts for events: garment types and fabric choices
Start with the garment, not the logo. The fabric and cut decide whether a shirt survives a full day on a trade show floor or ends up at the bottom of a drawer.
- T-shirts: the workhorse for fun runs, charity events and giveaways. Cotton is comfortable; cotton-polyester blends hold print and dry faster.
- Polos: the default for staff uniforms and conferences where a tidier look matters.
- Hoodies: the premium option for team-building days and cool-weather events. Heavier fabric costs more but gets worn for years.
- Caps and beanies: cheap per unit, high visibility, and a natural fit for outdoor activations.
- Workwear: durable shirts and jackets for operations teams who need branded kit that handles daily wear.
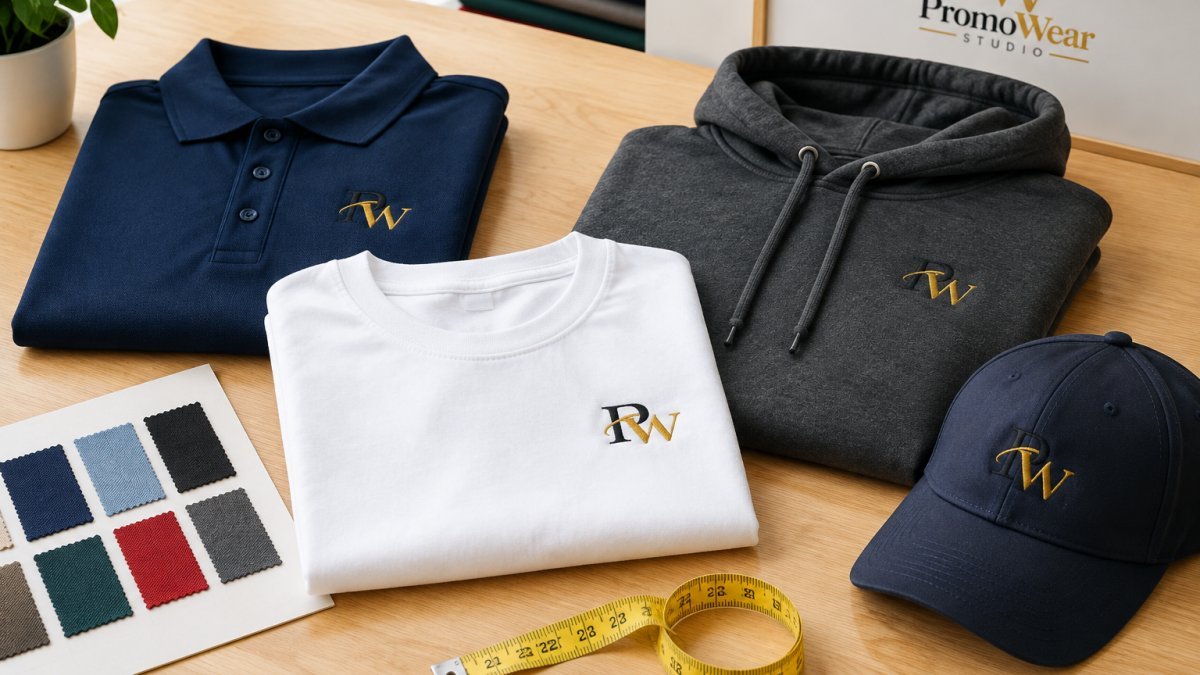
A common mistake is choosing the cheapest blank for everything. Heavier garments cost more per item but are generally more durable through repeated washing, which matters when staff wear the same shirt every week. For one-day events, a mid-weight tee is usually the sensible compromise.
Screen printing vs embroidery: choosing the right decoration method
Decoration method is the single biggest driver of both the look of the finished garment and the per-item cost, yet it is the decision most organisers leave until last. The right method depends on four variables: artwork complexity, order quantity, garment type and how long the item must last. Get the method wrong and you either pay for detail that disappears or accept a finish that will not survive the wash cycle.
Screen printing pushes ink through a mesh stencil, one screen per colour. It is commonly used for event T-shirts and large front or back graphics. Because a screen must be set up for each colour, setup cost is fixed per colour and the per-item price falls sharply as quantity rises. It handles bold shapes, solid blocks of colour and large prints well. It is less suited to photographic gradients, fine linework or very small orders, where the setup cost dominates the unit price.
Embroidery stitches thread into the fabric, producing a raised, durable finish suited to repeated wear. It is the default for polos, hoodies, workwear and caps. The constraint is detail: fine text, thin strokes and small lettering distort unless the logo is simplified or redrawn for stitching. Embroidery also requires a one-off digitised file, so it rewards logos that will be reused across multiple orders.
| Method | Best for | Strengths | Watch out for |
|---|---|---|---|
| Screen printing | T-shirts, event tees, large graphics | Bold colour, low per-item cost at volume | Setup cost per colour; weak on fine detail |
| Embroidery | Polos, hoodies, workwear, caps | Durable, professional finish | Small text distorts; needs digitising |
| DTG | Detailed multi-colour artwork on cotton | No colour limits, fine detail | Softer hand feel; less durable at volume |
| Heat transfer / vinyl | Small runs, names and numbers | Low setup, fast for one-offs | Stiff on large areas; film-dependent durability |
A practical decision path: if the artwork is a simple logo on a polo or cap, embroidery is a suitable choice. Where an order mixes garments, it is common to embroider the polos and caps and screen print the tees rather than forcing one method across the whole range.
Watch out: a detailed logo with fine text can lose legibility in embroidery unless it is simplified first. Switching method after artwork is approved costs both time and money, so lock the method before proofs are signed off. Review the printing options and embroidery service before committing.
Custom branded apparel: logo placement and artwork preparation
Logo placement makes or breaks the finished garment. A logo that sits too low on the chest or too close to a seam looks amateur, no matter how good the print quality is.
Common placements are left chest for polos and workwear, and front or back for event tees. Ask for a digital proof with the logo positioned to scale on the actual garment before production starts.
Artwork preparation is where most delays begin. Vector files generally produce the cleanest results, and embroidery requires a digitised file that tells the machine how to stitch each element. Digitising converts a logo into a stitch file. For sizing guidance, the uniform logo size and placement guide covers garment-specific measurements for polos and jackets.
The corporate apparel order checklist: quantities, sizing and size curves
Ordering the right quantity is harder than it looks, because sizing distribution rarely matches a simple headcount. A size curve, which is the spread of sizes across an order, helps avoid surplus smalls and a shortage of larges.
- Confirm attendee or staff numbers, plus a buffer for late additions
- Collect sizes in advance rather than guessing
- Apply a size curve weighted toward medium and large
- Add a small oversize allowance for layering under hoodies
- Confirm minimum order quantities with the supplier
- Check whether sizes run small or large against a sample
- Allow for a full range of sizes
- Keep a small stock of spares for replacements
A common mistake is ordering exactly to headcount. Events always produce a handful of no-shows and a handful of extras, so a modest buffer avoids a second run. For recurring branded activities, keeping a size register means the next order is faster and more accurate.
Budgeting for bulk orders: per-item pricing, volume discounts and total cost
Bulk apparel quotes are usually built from several cost lines, not only the garment. Comparing suppliers on the headline unit price alone is the most common budgeting mistake, because two quotes that look similar per item can land hundreds of dollars apart once setup, decoration positions and freight are included.
The five lines are:
- Garment cost, the blank itself, which varies by fabric weight, brand and size range.
A simple budget-planning method: estimate the garment cost at the target quantity, add decoration, setup and freight, then allow a contingency for late additions and a possible second run. Compare quotes on that full landed cost, not the unit price. Ask for a written breakdown so each line can be checked.
Watch out: a quote that looks cheapest per item can cost more overall if it excludes setup, freight or GST. Confirm what is included before comparing.
Planning timeline and turnaround: from quote request to dispatch
Lead time depends on the job, and new artwork, digitising or unusual garments generally need more room.
| Stage | Typical timing | What happens |
|---|---|---|
| Quote request | Day 1-2 | Requirements confirmed, pricing issued |
| Artwork approval | Day 2-5 | Logo digitised or print file prepared, proof signed off |
| Production | Day 5-15 | Garments sourced, decorated, quality checked |
| Dispatch | Day 15-20 | Order packed and shipped |
The biggest delay is almost always artwork approval, not production. Sign off proofs quickly and the rest of the timeline holds. For a hard deadline, confirm the dispatch date in writing at the quote stage and order early enough to absorb a courier delay.
Request a bulk custom apparel quote from Promo Wear Studio
The gap between a smooth apparel order and a stressful one comes down to planning: the right garment, the right decoration, accurate sizing and a realistic timeline. Get those four right and the branding takes care of itself.
Promo Wear Studio brings more than 26 years of experience to every order, handles orders of any size, and works with wholesale clothing partners to fit a range of budgets. Nationwide shipping is available.
Ready to move? Contact the team with your quantities, garment preferences and event date, and a quote will follow.
Most event apparel problems trace back to a rushed brief. Promo Wear Studio handles embroidery, screen printing, DTF and custom workwear in-house, accommodates orders of any size, and delivers nationwide with fast turnaround. Get started with Promo Wear Studio and put a properly planned apparel order behind your next event.
Frequently Asked Questions
What types of custom apparel work best for corporate events?
The event format decides it. One-day conferences and fun runs suit lightweight custom T-shirts and polos, which are cheaper per item and easy to size across a crowd. Multi-day campaigns, trade shows and outdoor team-building days call for hoodies or workwear that hold up to repeated wear. Caps and bags work as add-on items for giveaways. Order a small sample before committing to a large run so you can check fabric weight, print quality and fit.
How far in advance should I order bulk custom apparel for an event?
Allow adequate lead time, and longer if you need artwork changes, samples or a large size curve. Build a buffer for dispatch and delivery. If your event date is fixed, confirm production time in writing before you pay a deposit.
How do bulk order quantities affect custom apparel pricing?
Quotes are usually based on quantity, so compare quotes on the same specification. Ask whether setup fees are included and whether the price holds if your final headcount shifts. Pricing depends on quantity, dates and delivery, so request a current quote rather than relying on last year’s figures.
How can I make sure branded apparel fits a range of attendees?
Build a size curve from your RSVP list rather than ordering evenly across sizes. Most adult groups skew toward medium and large, with fewer small and extra-large units. Collect sizes at registration so you can adjust the order before production. Keep a few spare units in the most common sizes for late additions, and confirm the supplier’s size chart before you finalise quantities.
